In this lesson, we’ll walk you through how to set up a Mosaic Limit order using TWS Mosaic.
- We’ll define the objective of the Limit order type
- Show you how to create a Limit order in TWS Mosiac
- Show you where you can locate Limit orders within the Activity panel
Limit order
When you select a limit order, you’re choosing to buy or sell shares at a specified price or better – that is the highest amount you’re willing to pay for your shares, and the least you’re willing to sell them at.
If the order fills, the limit order ensures that it will not be at a price less favorable than your limit price. However, it does not guarantee a fill – especially in quickly moving markets.
Creating a Limit order in TWS Mosaic
IBKR’s Trader Workstation offers you the option of using the Limit Order type when submitting your trade.
Here’s how it’s done:
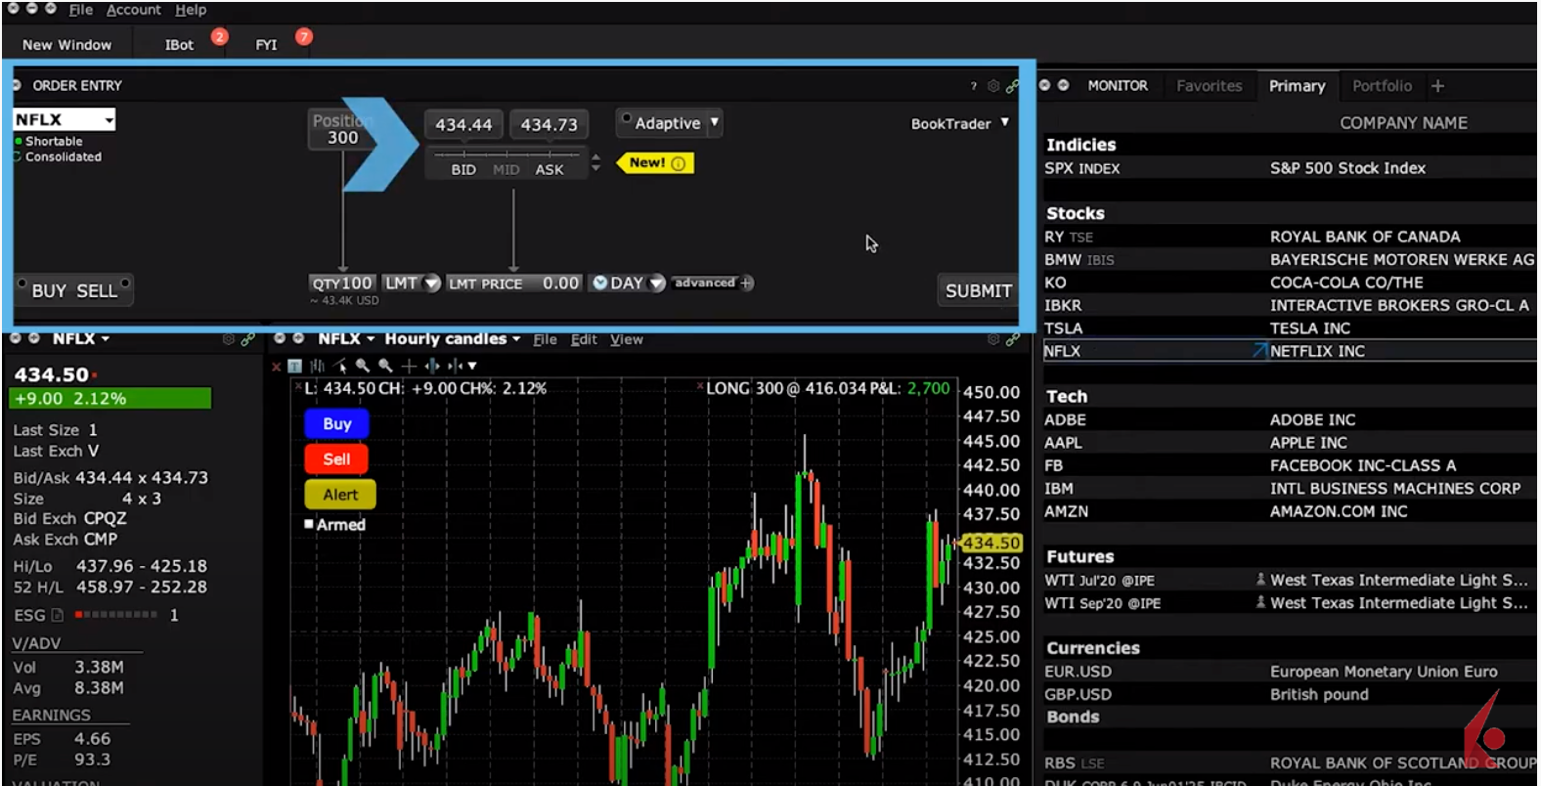
Select your desired ticker symbol on a Watchlist in the Monitor Panel, and you’ll see it populate in the Order Entry window.
For illustration purposes, I’ll choose NFLX, the ticker symbol for Netflix.
Here, you can see the current market price for the stock in the BID ASK quote above the Buy or Sell triggers.
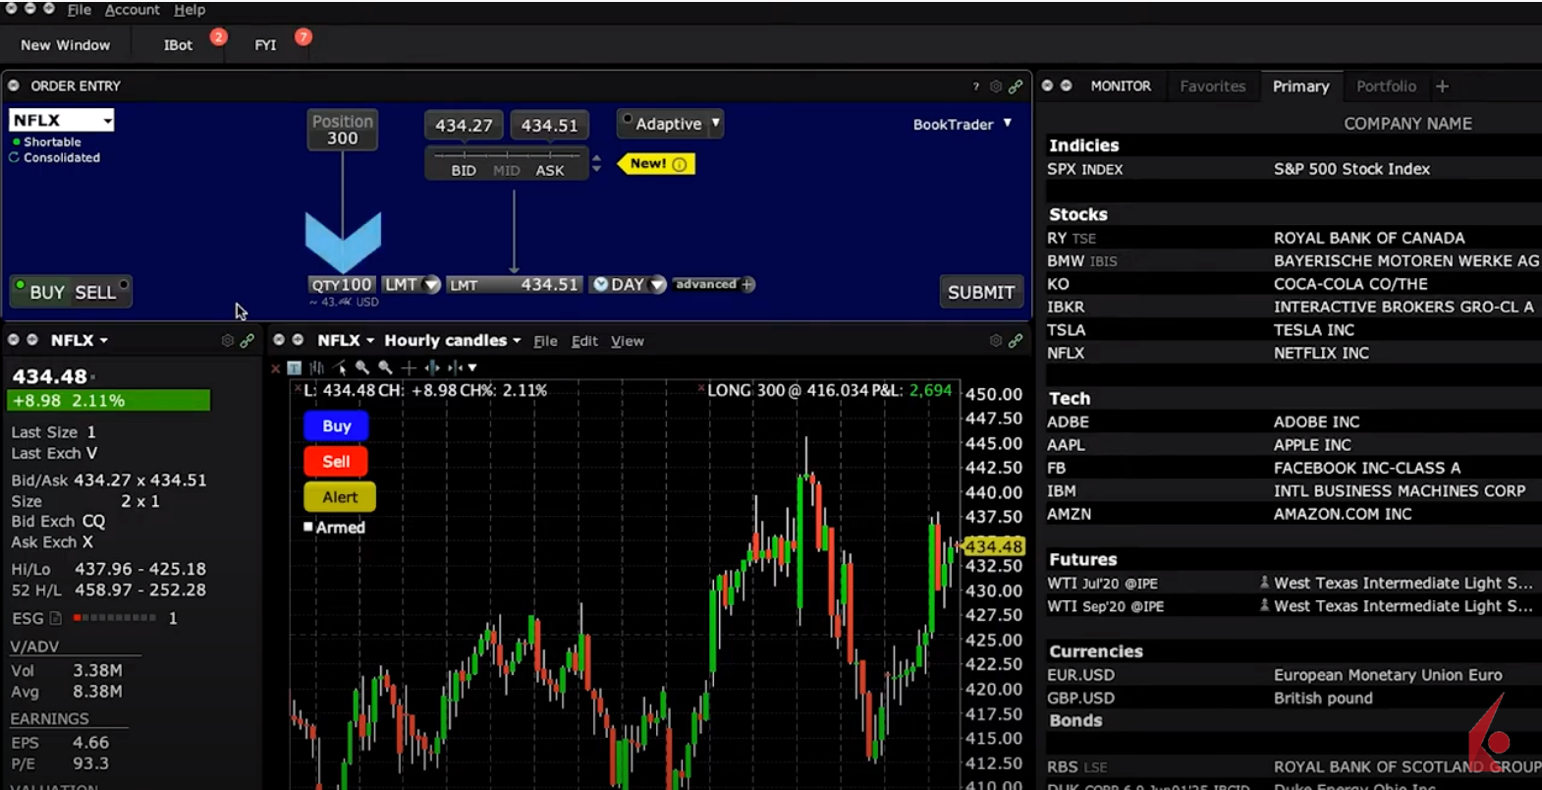
 Now, watch closely as I create an order to Buy Netflix shares at a little above the prevailing price.
Let’s say I want to purchase 100 shares of this company.
Well, I can either enter that number directly into this input field, or I can click on Quantity and select it.

Now, I want this to be a Limit Order, so I’ll choose LMT for limit in the order type dropdown menu.

You’ll also want to specify your desired limit price – which you can do with this price wand.
*Remember, since this is a buy limit order, this is the highest amount you’re prepared to pay for these shares.
When you click the Price input field you can easily see the prevailing Bid and Ask values. You may choose these, or the calculated Midpoint, which is also noted.
 Or scroll up or down with the mouse wheel to locate higher prices – or lower ones if this was a sell limit order.
Use the +/- tick column to select values relative to the bid.
Notice the percent or penny icons – these display the values differently. For example, for any limit order, If I choose the penny display, I can easily select a specific number of pennies above or below the prevailing quote.
 Now let’s go back and complete our limit order.
In this example, I want to submit this as a Limit order good for the day only and so will leave the Time-in-Force input field as Day. You can also choose Good-till-Cancelled as another option.
Let’s look at what we’ve done so far. Go ahead and click on the submit button to pull up the Order Confirmation window.

Here you can see the number of shares we said we wanted to buy – 100 shares of Netflix – along with the Limit Price we specified, as well as the Day order we asked for. Great, all the details match the buy limit order we wanted.
*Remember, you can enter Limits for Good-Till-Cancelled orders, as well as for open positions, not just new ones.
Ok, we’re almost done.
Locating Limit orders within the Activity panel
Once you click the Transmit button and submit your order for execution, you can see it on the Orders tab below in the Activity monitor.

You can also see live orders displayed on the chart of the security.
 Buy orders created in the order entry panel are denoted with a green horizontal line. If this was a sell order, you’d see a red horizontal line. You can also adjust the line in the chart to modify the order.
Limit order
*Again, Limit orders may not execute, or may not fully execute, when you specify your Limit price.
While that is a restriction of this order type, some investors may prefer that outcome to using a market order that fills regardless of price.
Now that you know how to create a Limit order in Mosaic, let’s turn our attention in the next lesson on order types in Traders’ Academy.


Join The Conversation
For specific platform feedback and suggestions, please submit it directly to our team using these instructions.
If you have an account-specific question or concern, please reach out to Client Services.
We encourage you to look through our FAQs before posting. Your question may already be covered!