TWS QuickStart
Browser-based or Stand-alone?
You can run TWS directly from your internet browser, or download the application to your desktop and run it from your PC. If you have a broadband connection, we recommend running the browser-based version of TWS, since this requires minimal maintenance and ensures that you are always running the latest release.
If you use a dial-up connection, we suggest downloading the TWS standalone version and running it from your desktop, as this may result in better performance. To download the standalone version, from the Software menu select Trader Workstation. From the Software tab, select your platform from the Standalone Downloads section.
Note that you must have Internet access in order to receive market data and submit orders, regardless of whether you are running TWS from the browser or from your desktop.
Log In
Once your account has been approved and funded, you'll be able to successfully log in to the Trader Workstation.
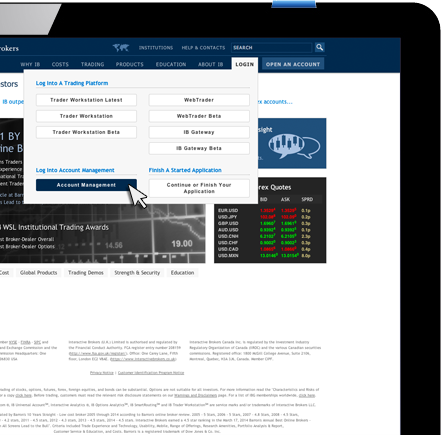
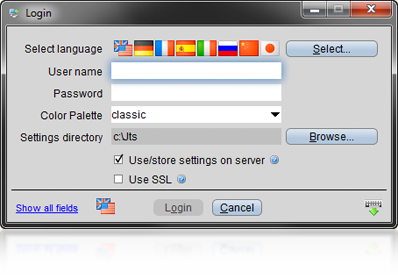
To log in to the browser-based version, from the Login menu on the IB website select Trader Workstation. In the Login box, enter your username and password, and click Login.
To log in to the standalone version, double-click the TWS icon on your desktop, enter your username and password, and click Login.
Select Your Workspace
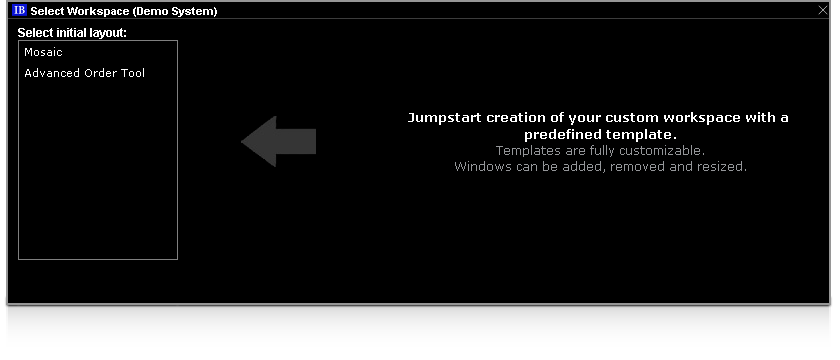
The first time you log in to TWS, you will be asked to choose a workspace template. The Mosaic template is recommended for most traders as it provides intuitive out-of-the-box usability with quick and easy access to trading, order management and portfolio tools. These instructions are valid for the Mosaic workspace. Users can easily switch between the Mosaic and Advanced Order mode at any time.
Enter Ticker Symbols
TWS supports direct-access trading for options, futures, forex, stocks, bonds and funds. Before you can view real-time data, you must log in to Account Management and select your market data subscriptions. Once you have subscriptions, add your ticker symbols to the Mosaic Watchlist. Products to which you do not subscribe will display delayed data if allowed by the exchange.
To Add a Ticker
- Click in an empty Watchlist row, enter the underlying symbol, and hit Enter.
- Choose the asset type from the Contract Selection list and define the asset.
Hint: By default, your ticker uses “SMART” aggregate market data and your orders will use SmartRoutingSM to attempt to get best-price execution. To define a direct-route quote, expand the Contract Selection list using the Expand arrow at the bottom of the list.
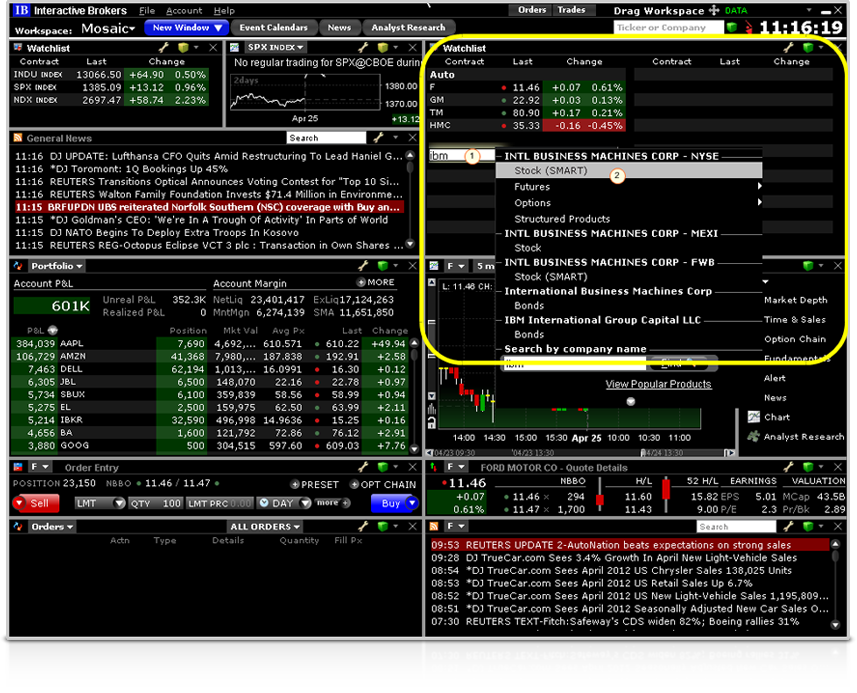
The ticker has been added to the Watchlist. Continue to add ticker lines to the Watchlist.
Use Windows Grouping
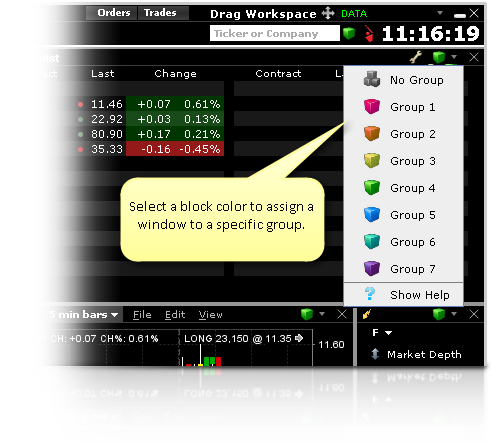
Mosaic uses a feature called “Windows Grouping” to efficiently change the ticker symbol in all associated windows when you select it in one window. Windows Grouping works by assigning windows to groups which are designated by the colored “linking” block in the top right corner of each tool.
Note that the Watchlist is part of Group 4 as indicated by its green block.
The underlying focus of all Group 4 windows is currently “F.” If GM is selected in the any Group 4 window, all of the Group 4 windows will show “GM” as their underlying. This “enter once, use everywhere” approach saves time and makes your workspace extremely efficient.
Easily create a new group or change the group to which a window belongs by clicking a window’s linking block and selecting a new block color.
Send an Order
Use the Order Entry panel to create an order on the symbol that is currently the focus of the group. By default the Order Entry panel is part of Group 4 which also includes the Watchlist. The default order parameters appear in grey. For a stock order, the default is a 100 quantity Day Limit order.

To Create an Order
- Ensure you have the correct contract in the Order Entry panel. To change the symbol, select a new one in the Watchlist window or enter/select a new one in the underlying drop-down list of the Order Entry panel.
- Confirm/change order parameters. Note that all parameters except the Limit Price field have a default value that can be used.
- Use the Order Type dropdown arrow
 to expand the offerings, and select a new order type.
 - Enter the quantity by clicking in the QTY field and selecting or entering a new quantity.
- Specify a price (market orders will use the market price).
- Use the Time in Force dropdown arrow
 to expand the offerings, and select a new time in force.
- Use the Order Type dropdown arrow
- Click the desired action button.
- Use the dropdown arrow from the Buy or Sell button to save the order without transmitting, or to check the margin requirements before you submit the order.
Monitor Your Orders, Trades and Portfolio
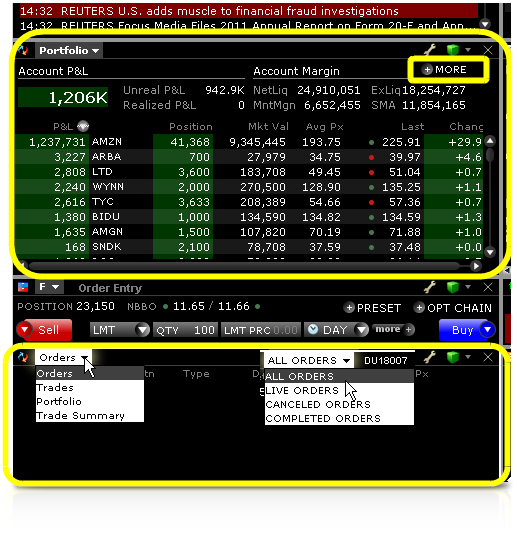
The Mosaic includes an Activity Panel comprising four different screens. The Activity Panel lets you view, Orders, Trades and Trade Summary, and your Portfolio. In the initial Mosaic workspace layout, the Portfolio and Orders windows are displayed but you can quickly change the display using the dropdown selector.
Portfolio
The Portfolio window shows your positions plus key account values and balances. Click More to see the full TWS Account Information window.
Orders
The Orders window shows All Orders by default. Use the dropdown selector to change the display to Live Orders, Canceled Orders or Completed Orders.
To view recent executions and a summary of trades for the day, from the dropdown list shown in the Orders panel above, select Trades or Trade Summary.

Options involve risk and are not suitable for all investors. For more information, read the "Characteristics and Risks of Standardized Options" before investing in options. For a copy, click here. There is no guarantee of execution. Orders will be routed to US options exchanges.
Any trading symbols displayed are for illustrative purposes only and are not intended to portray a recommendation.
